How to Animate Infographics with Google Gemini (Part 2)
Turn your static infographics into animated reels with a single Google Gemini prompt. Step-by-step guide with a ready-to-use template.
You created a stunning infographic with ChatGPT. The 3D render is flawless, the data panels are perfectly aligned, and the typography looks editorial. You upload it to Instagram and… it gets buried in a feed of thousands of static images.
The problem isn’t your design. It’s the format. In 2026, the algorithms behind Instagram, TikTok, and YouTube Shorts prioritize video over static images by massive margins. An 8-second animated infographic generates up to 3 times more engagement than the same infographic as a JPG.
The good news: you no longer need After Effects, CapCut, or hours of manual editing. With Google Gemini and a well-structured prompt, you can transform any static infographic into a professional-looking animated reel — in under two minutes.
From Static Image to Animated Reel: What Google Gemini Does with Your Infographic
Google Gemini integrates video generation from images through its Veo model. Unlike tools that simply apply zoom or basic panning effects, Gemini interprets the elements of your design and assigns coherent animations: text fading in, lines drawing themselves, icons scaling smoothly.
The result is a short video with a professional motion graphics aesthetic — the kind of animation that typically requires specialized software and technical animation skills.
Why Gemini Over Other AI Video Tools?
Several AI video generation platforms exist, but Gemini has specific advantages for this use case:
| Feature | Google Gemini | Common alternatives |
|---|---|---|
| Original design preservation | Maintains exact composition, text, and elements | Often reinterpret or distort the design |
| Prompt control | Detailed layer-by-layer instructions (header, subject, data) | Limited or generic control |
| Animation quality | Clean motion graphics, smooth transitions | Robotic or exaggerated movements |
| Accessibility | Free tier available | Many require paid subscriptions from the start |
| Output format | Optimized for 9:16 (reels and shorts) | Not all support native vertical formats |
Important: Gemini doesn’t always produce perfect results on the first try. Like any generative AI tool, it may take 2-3 iterations to get exactly what you’re looking for. The key is prompt quality — and that’s what you’re about to master in this article.
The Complete Prompt to Animate Your Infographic in Gemini
This is the prompt that transforms a static infographic into a reel with professional animations. It’s designed to be used directly in Google Gemini alongside your infographic image.
Simply upload your infographic to the Gemini chat and paste the following text:
Animate this 9:16 infographic poster about [INFOGRAPHIC TOPIC] as a
smooth professional reel. Keep design, subject, text, and composition
exactly as they are.

Animation:
1. Soft fade-in of the headline.
2. Organic "idle" motion on the subject (breathing, blinking, or fins)
   without overdoing it.
3. Connector lines drawing outward.
4. Data panels appearing with scale/fade and clean motion graphics
   on icons.
5. Minimal presenter gesture (nod or pointing).
6. Bottom strip sliding in at the end.

Glossy, polished, educational, and premium finish.
End on a full static hold.
Replace [INFOGRAPHIC TOPIC] with your design’s specific topic — for example: “respect as a core value”, “the water cycle”, or “white shark anatomy”.
Prompt Anatomy: Why Each Instruction Matters
This isn’t a random prompt. Each line controls a specific aspect of the animation and is designed to prevent the most common mistakes in AI video generation.
The Base Instruction: Context and Design Protection
Animate this 9:16 infographic poster about [TOPIC] as a smooth professional reel.
Keep design, subject, text, and composition exactly as they are.
These two lines do the most critical job: protecting your original design. Without the instruction to maintain the exact composition, Gemini could reinterpret elements, move panels around, or alter the typography. The mention of “smooth professional reel” sets the quality standard and output format.
Layer-by-Layer Animation Sequence
The numbered block from 1 to 6 is not a list of suggestions — it’s a temporal sequence. Gemini interprets the numbered order as the animation’s progression:
| Step | Instruction | What it achieves |
|---|---|---|
| 1 | Soft fade-in of the headline | The title appears first, setting the topic for the viewer |
| 2 | Organic idle motion | Brings the central subject to life without jarring movements |
| 3 | Connector lines drawing outward | Creates the feeling that information is being “built” |
| 4 | Data panels with scale/fade | Data appears progressively, easy to read |
| 5 | Minimal presenter gesture | Reinforces human connection if there’s a character |
| 6 | Bottom strip sliding in | Professional close with branding or call to action |
The Closing Instructions: The Premium Finish
Glossy, polished, educational, and premium finish.
End on a full static hold.
The “glossy finish” line works as a global quality modifier — it elevates the rendering quality across the entire animation. And “end on a full static hold” is crucial: without this instruction, Gemini might cut the animation abruptly or add unwanted transitions at the end. The static hold lets the viewer absorb the complete design before the video ends.
Step by Step: How to Generate Your Reel in Google Gemini
The process is surprisingly simple once you have your infographic ready and the prompt prepared.
Step 1 — Prepare Your Static Infographic
If you don’t have an infographic yet, you can create one using the method we covered in our ChatGPT infographic guide. The key requirements are:
- Vertical 9:16 format (1080 × 1920 px)
- Well-defined elements: headline, central subject, data panels, connector lines
- Readable text: clear typography, no confusing overlaps
- High resolution: the better the input image, the better the animation
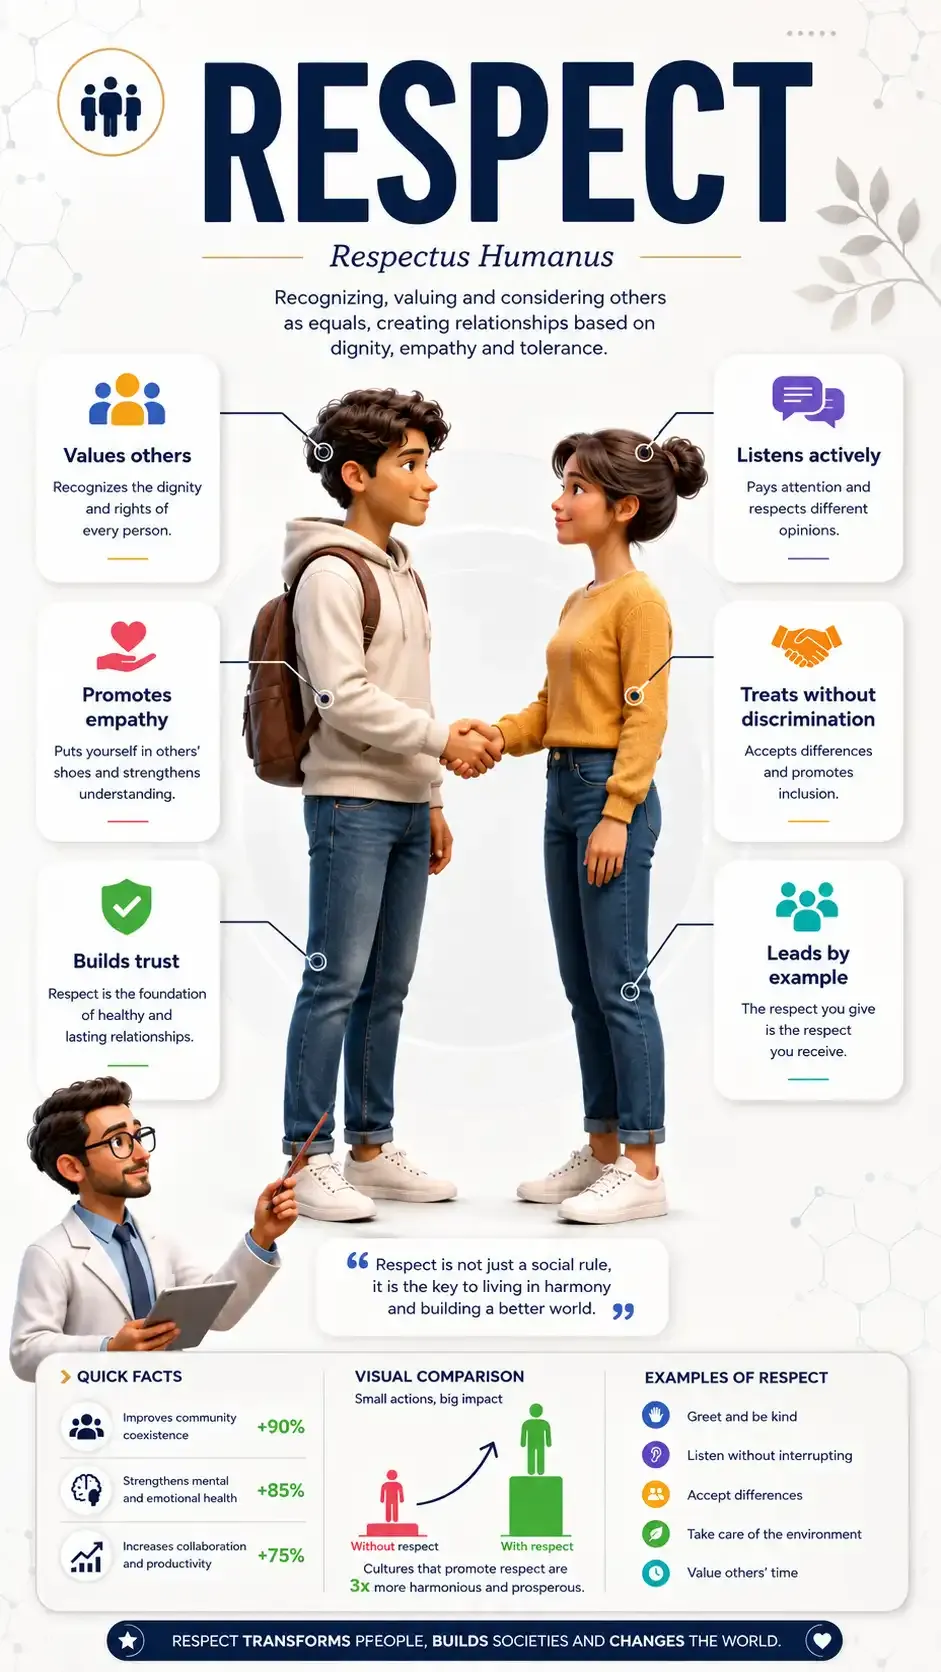
Here’s an example of a static infographic ready to animate:
Step 2 — Open Google Gemini and Upload the Image
- Go to gemini.google.com and sign in with your Google account.
- In the chat field, click the image icon (or drag and drop the file directly).
- Upload your infographic in PNG or WebP format.
Step 3 — Paste the Prompt and Customize It
Copy the complete prompt from the previous section and paste it into the chat alongside the image. Remember to replace [INFOGRAPHIC TOPIC] with your design’s actual topic.
Step 4 — Review and Adjust
Gemini will generate a short video (between 5 and 10 seconds). Check these points:
- Was the original design preserved? Text, colors, and layout should be faithful to your infographic.
- Are the animations smooth? Jerky or exaggerated movements indicate you need to add “subtle” or “minimal” to the relevant instructions.
- Does the subject move naturally? If the idle animation is excessive, specify “nearly imperceptible micro-movement”.
Pro tip: If the first result doesn’t convince you, don’t change the entire prompt. Only adjust the specific instruction that failed. For example, if the connector lines don’t animate correctly, try rephrasing just step 3: “Thin connector lines that progressively draw from the subject toward the outer panels”.
Real Result: From Static Infographic to Animated Reel
To see the result in action, here’s a real example generated with this exact method. The original infographic about respect as a core value was animated entirely with Google Gemini using the exact prompt you just read:
Notice how each element activates in sequence: the title appears with a soft fade, the central character has a subtle idle micro-movement, the lines draw progressively, and the data panels emerge with clean motion graphics. All without any manual editing.
Common Mistakes and How to Avoid Them When Animating with AI
After testing this workflow with dozens of infographics, these are the most frequent issues and their solutions:
Text Gets Distorted or Becomes Unreadable
This is the most common error in AI video generation. Models sometimes “repaint” text instead of keeping it intact.
Solution: Reinforce the preservation instruction by adding “Keep every text character exactly as it appears in the original image, without modifying font, size, or content”.
The Subject Moves Too Much
Gemini can interpret “organic motion” too aggressively, causing the character to shift position or move around.
Solution: Change “organic idle motion” to “subtle idle micro-animation: only near-imperceptible breathing, no displacement”.
The Animation Is Too Short
Sometimes the generated video lasts barely 3-4 seconds and doesn’t have time to show all the sequence steps.
Solution: Add to the end of the prompt “Minimum duration: 7-8 seconds. Each animation step should have enough time to be appreciated”.
Colors Change from the Original
The model can alter the color palette during animation, especially on backgrounds with gradients.
Solution: Specify “Preserve the exact color palette of the original image throughout the entire animation”.
Beyond the Reel: Practical Uses for Animated Infographics
Once you master this workflow, the applications go far beyond posting a reel on Instagram:
- Academic presentations: Insert the video into PowerPoint or Google Slides to explain complex concepts in a visual and dynamic way.
- Educational material: Teachers can create animated resources for their classes without any video editing knowledge.
- Professional networking content: LinkedIn prioritizes video content — an animated infographic about your area of expertise can position you as a thought leader.
- Creative portfolios: If you work in design, communications, or marketing, these reels demonstrate mastery of emerging tools.
- Science communication: Researchers and educators can transform complex data into accessible videos for the general public.
If you’re interested in exploring more AI tools for creating visual content, check out our guide on how to restore and enhance photos with AI or discover what Kimi AI can do as a research assistant.
Your Infographic Deserves to Move: Start Today
The complete workflow is simpler than it seems: create the infographic with ChatGPT, animate it with Google Gemini, and publish a reel that competes with content produced by professional teams. Two AI tools, one result that just months ago would have required days of work in After Effects.
Open Google Gemini, upload your best infographic, and paste the prompt. In under two minutes you’ll have your first animated reel ready to publish.
Have you tried this method with any of your infographics? Tell us how it went in the comments — and if you want to start from scratch, begin with our guide to creating infographics with ChatGPT.